So, you want to build your very first own app. Good.
You just landed on the most comprehensive blog post ever written about app creation!
Please note that no coding or other skills-oriented experience is required!
After reading this post you will not just have a clear idea of how to create an app; you will have a whole manual in your hands (or bookmarks) that if executed as suggested, you will be successfully launching your dream app in no time.
Read until the end for a special bonus!
Table of contents
- Idea generation
- Map your idea
- Make a prototype
- Test your idea
- Develop the app
- Bonus material
- Pre-launch marketing
- Post-launch marketing
- Final thoughts
Idea generation

To create an app you will first need an idea. Sounds obvious right? You can generate an idea in 2 ways
a) have a Eureka! moment, or
b) be strategic
The Eureka! Moment: This way is self-explanatory. Without taking any action, the idea will pop up in your head, given a specific interaction with the world or the system has occurred. This interaction is usually a problem/issue you might face or specific stimuli that actually trigger the generation of the idea.
Be strategic: This way is practiced by most serial entrepreneurs as it is more like a routine rather than random thoughts. Thomas Edison, the father of the strategic idea generation suggested the following steps (retrieved by innolytics-innovation.com)
- Enabling: The search for the right field of innovation
- Defining: Develop search queries and specify search paths
- Inspiring: Search for thoughts and stimuli from other areas
- Selecting: Generate and evaluate ideas
- Optimizing: From the initial idea to the mature concept
- Nurturing: Enrich ideas with various implementation strategies
Being strategic doesn’t have to always comply with the above steps and of course, there is an undeniable intersection between being strategic and the Eureka! moment. We won’t go into more depth on this subject now but you can always do your own research or read a couple of books. The accidental creative is highly recommended.
Cost: $0
Map out your idea

You finally have the idea.
You also know what you want your idea to solve or achieve.
What you need to figure now is how the idea will look like.
Use a whiteboard and some sticky notes to identify all the possible flows of your users.
If you want to learn more about how you can strategically map your ideas read our article on design sprints.
Cost: $0
Make a prototype
The prototyping phase is evidently the first sign that distinguishes idea generators from real entrepreneurs. It also distinguishes high-end professionals from amateur ones.
Nobody wants to create something only to find out that it is absolute nonsense or useless.
It is a big-time – and money – saver to create a prototype. Prototyping will also fill any gap in communication between designers/entrepreneurs etc. and developers accelerating the development cycle.
Now, there is a big misunderstanding out there. Prototypes do not have to take months and it is absolutely not a complicated thing exclusively done in Silicon Valley.
There is a handful of amazing prototype tools that makes the whole prototyping process a piece of cake.
InVision is the world’s leading design collaboration platform that helps teams of all sizes to deliver better digital experiences, faster, together. The platform allows you to create interactive clickable prototypes and helps you iterate quickly during the design phase. InVision comes with powerful features, an intuitive interface, and many useful plugins.
Sketch, another powerful tool, lets you create your best work — from concept to final designs.
Marvel is an all-in-one design platform that has everything you need to bring ideas to life and transform the way you create digital products. With Marvel, you can wireframe, design, prototype, and create design specs in one place.
Finally, Figma offers powerful prototyping, so you can quickly build flows by connecting screens and adding in elements like interactions, transitions, overlays, and more.
Note that Useberry integrates with all of these tools, making your life much easier!
Cost: $0
(with free versions of the above tools)
Test your idea
Now it is time to put everything you have done so far into a crash test!
Handing your prototype over to your preferred audience to gain real insights that will help you build the actual product. As research shows, getting insights during the prototype phase considerably reduces the overall cost and the resources spent.
It will be a true disaster if you need to redesign/rebuild parts of the app in the future as even minor changes in the code would create a domino effect in the app as a whole.
There are many user testing tools out there but most of them don’t go above and beyond.
Useberry is the most complete solution in user-testing. Not only does it integrate with the biggest prototype creation tools but it is also as easy as ABC. Useberry is the only tool of its league that offers video recording.
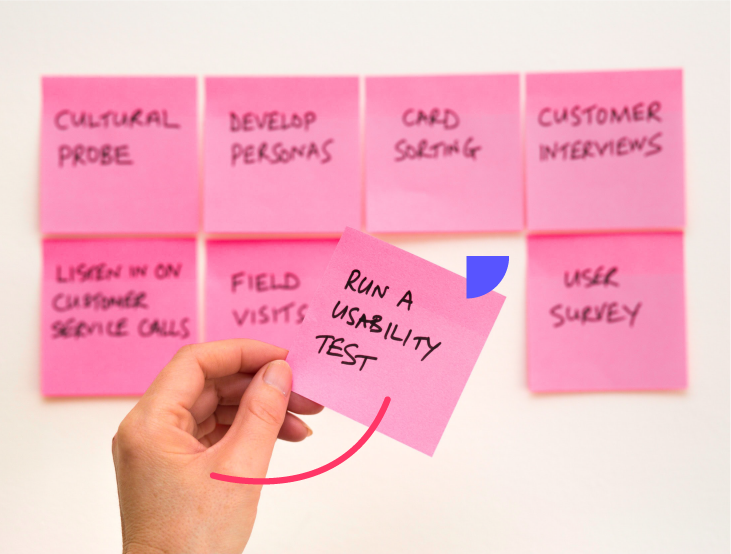
Tests to consider in Useberry
- Single task
- Multiple tasks
- Open analytics
- First click
- 5-second test
Without all the hassle usually required, you will make the right decisions rest assured that you have successfully eliminated all the guesswork and fully realized what users really want.
Develop the app

If you have reached this phase you deserve to be called an entrepreneur!
Developing an app from scratch is not the easiest task that you will need to do but it is not the hardest either.
First, you need to decide on the type of app. Overall, there are three types of apps:
- Native apps (iOS, Android, Windows Phone)
- Hybrid apps for all platforms (Xamarin, Ionic, React Native, etc.)
- Web apps (a responsive version of the website)
Next, you have to decide who is going to develop the app.
If you don’t have that much coding experience (if you do skip this) there are still ways to build your dream app by yourself. Tools that will help you with that are:
Of course, you can outsource the creation of the app to these websites:
- Fiverr
- Upwork
- People per hour
- Freelancer
- Guru
- Your local web developer
If you have coding experience and are ready to jump on the project alone just have in your mind the following:
- Unit Testing: Most languages have unit testing frameworks, and developers should look into one. Tests usually run periodically, and most of the time after changes in the source code have happened. The more tests run, the better, as a problem can be found faster.
- Versioning: It offers a range of functionalities, such as storing versions, collaboration, restoring, and backup. Version control is necessary, especially if a team of developers is working on the app project, and many versions are worked on simultaneously.
- Share Knowledge: Sharing is caring! Developers should share their insights, knowledge, and feedback gained while in the development process. That’s the way communities are built and quality software is delivered to happy customers.
Bonus material (real business)
Launching

The success of any product in the market usually comes down to one single factor: the demand of the market for the product.
Marketing helps you with exactly that and this is why you should spend some quality time figuring it out.
The question is, when are you going to start marketing your app?
Before or after you release it? The answer is that you should always go for the first option. Not taking marketing actions until the release, equals a lot of wasted time.
There are a number of things you can do to reach out to your potential future customers, such as beta testing, or building awareness and an email list.
Starting with awareness, takes time to build, so the sooner you start raising it, the better. Also, in contrast to conversion or the rest steps of a marketing funnel, awareness doesn’t require an action from your audience – only letting them know that you exist. And thus, you don’t need a finished app or product to achieve that.
And then, there are email lists. An email list is something you should also focus on building from the very beginning. Email marketing is still one of the most powerful marketing channels. It has a fast user adoption rate and a high return on investment you can’t afford to miss.
Next, there is beta testing. Besides finding bugs and exploring new features, beta testing is a great way to build an audience in the pre-launch phase. It’s how Evernote, for example, managed to have more than 125,000 users in the early stages. You can find such beta testers on Ubertesters, Betalist, TechCrunch, or even Reddit.
Post-launch Marketing
Congratulations! Your app is now LIVE. What now? Now it’s time to increase your exposure.
To start with, prepare a press kit.
A press kit, or a media kit, is all the promotional material the Media will need to provide the best possible information about your app and your company.
The kit should include the best features of your app, pricing, FAQ, release information, and contact details. You shouldn’t also forget to include screenshots, icons, logos, banners, and, if possible, a video uploaded on Vimeo or Youtube.
Depending on the nature of your app influencers could be a serious opinion-making force to help you reach your marketing goals.
Try reaching out to industry leaders, bloggers, journalists, and influential people from your field. Email outreach is usually the best way to do that and capitalize on their authority.
Feel free to contact us!
We’d love to know your experience with Useberry and we will be excited to hear your thoughts and ideas.